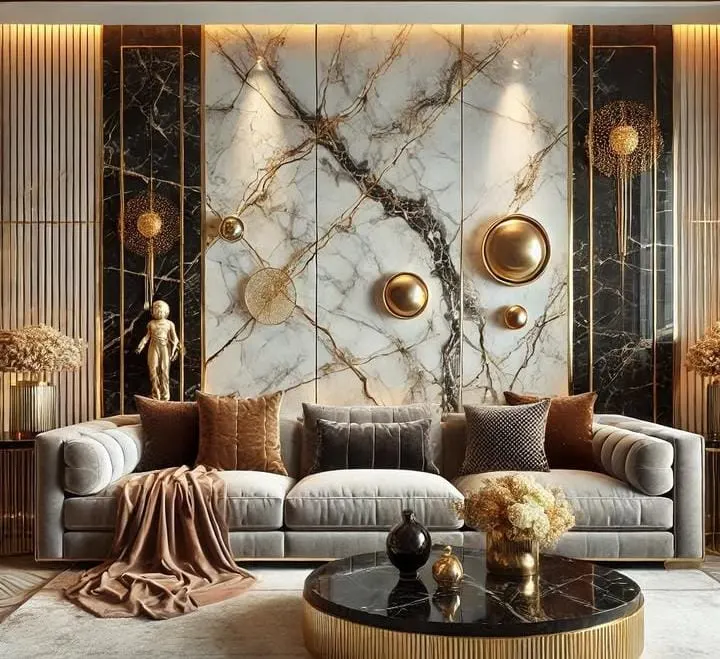
25+ Door Painting Ideas for Your Bedroom & Home — Transform Ordinary Doors into Design Statements
Your bedroom door is more than just an entrance; it’s the gateway to your personal sanctuary. Painting it with creativity and purpose can completely transform your space—turning an overlooked element into a style-defining feature. The right color, finish, or design can make a door whisper calm elegance, radiate warmth, or add that perfect bold accent your room has been missing. Bedroom door painting ideas allow you to bring character, texture, and emotion right to your threshold.
Whether you want a modern sleek look, a rustic cottage vibe, or something timeless and romantic, the way you treat your bedroom door can change the entire mood of your space. From muted neutrals to striking blacks, pastel charm to artistic hand-painted murals—each approach can mirror your personality beautifully. It’s a small project with a huge payoff, both visually and emotionally.
If you’ve ever stood in your room and felt something was missing, maybe it wasn’t the furniture or the wall color—it was your door, quietly asking for a touch of attention and style.
Also read: 15 Trending Bedroom Door Designs
A Door Can Change the Whole Story
We often underestimate the impact of painted doors in interior design. A freshly painted door can tie together your flooring, wall tones, and décor elements with surprising harmony. It’s an instant mood-lifter and can even make your bedroom feel larger, warmer, or more cohesive depending on your color and finish choices. A matte sage door can make a boho room feel calm, while a glossy black door instantly adds sophistication and depth.
Repainting your bedroom door isn’t just a color update—it’s a transformation of mood, texture, and emotion. Each brushstroke is a subtle way to express your individuality and create a home that feels unmistakably yours.
Also read: Dream House Interior Design
Color That Speaks Your Mood
Color psychology plays a big role in how we experience spaces. Painting your bedroom door gives you a chance to experiment with emotional tones without overwhelming the room. Want to feel grounded? Choose earthy clay or terracotta. Looking for serenity? Try soft blues or creamy neutrals. Craving drama? Deep plum or emerald green will never fail you. The door becomes your accent—your small, yet bold statement of personality and taste.
Think of it as painting your room’s “handshake.” Every time you enter, you’re greeted with warmth, creativity, and emotion—an invitation to rest, dream, and be yourself.
Also read: 15 Living Room Paint Color Ideas
Table: Door Painting Inspirations at a Glance
| Style Theme | Suggested Color Palette | Finish Type | Design Element |
|---|---|---|---|
| Modern Minimalist | White, Charcoal, Dove Gray | Satin | Sleek panels or trim lines |
| Cottage Cozy | Cream, Sage, Dusty Blue | Chalk Paint | Distressed edges |
| Artistic Expression | Terracotta, Mustard, Olive | Matte | Brush texture or mural art |
| Romantic Vintage | Soft Blush, Ivory, Faded Mint | Satin/Gloss | Ornate handles & trims |
| Bold & Contemporary | Black, Emerald, Navy Blue | High Gloss | Statement contrast trim |
20 Stunning Door Painting Ideas for Your Bedroom
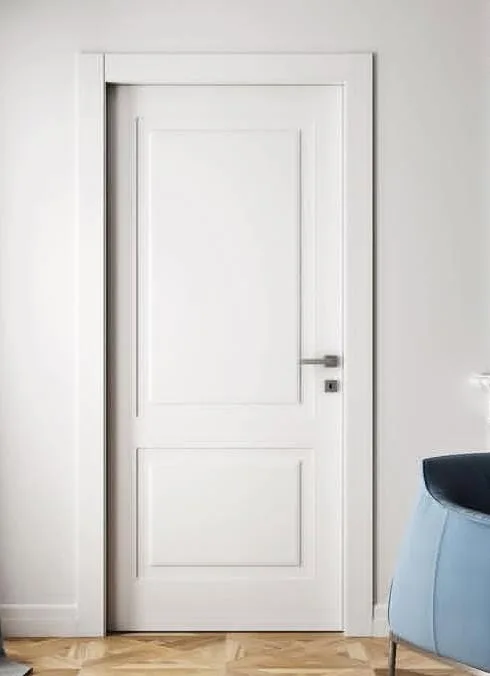
1. Classic White Elegance
Materials Needed: White satin paint, primer, sandpaper, painter’s tape, paint roller, small angled brush, and microfiber cloth.
Instructions:
- Begin by removing the door from its hinges for smooth painting.
- Clean the surface using a damp cloth to remove dust or oils.
- Lightly sand for better paint adhesion.
- Apply painter’s tape around hinges and handles.
- Prime the door completely to seal old finishes.
- Let it dry for at least 2 hours before painting.
- Apply your first coat of satin white paint using a roller for flat areas.
- Use an angled brush for corners and panel grooves.
- Wait for the first coat to dry completely.
- Lightly sand between coats for an even finish.
- Apply the second coat for a clean, opaque look.
- Inspect for streaks or missed spots.
- Reattach door hardware once fully dry.
- Hang the door back carefully.
- Enjoy the serene, timeless glow of a white bedroom door.
Benefits:
White is timeless and versatile—it reflects natural light, making your bedroom feel airy and larger. This style blends perfectly with minimalist, coastal, or Scandinavian themes, creating an uncluttered, refreshing vibe.
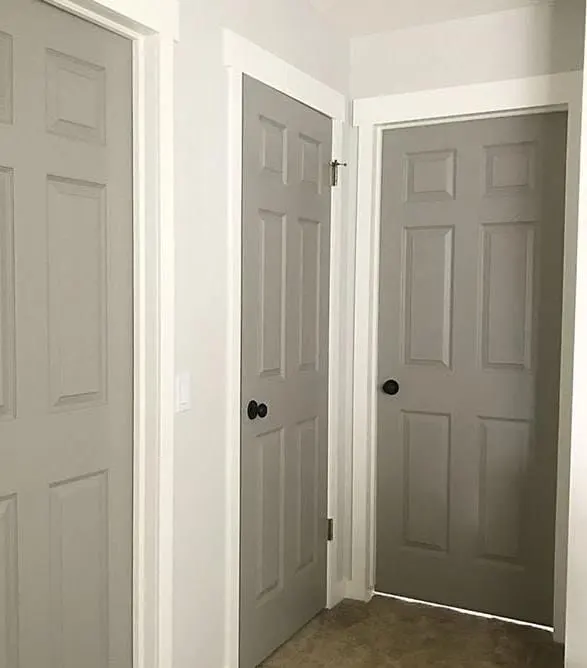
2. Soft Pastel Serenity
Materials Needed: Pastel blue, blush, or mint paint, roller, brush, painter’s tape, and primer.
Instructions:
- Choose a gentle pastel hue that complements your wall tone.
- Clean and lightly sand your door.
- Tape off trim or hardware areas.
- Apply a primer suited to your door material.
- Let primer dry fully before applying color.
- Start painting with a roller for the smooth center section.
- Use a fine brush for trim or panel detailing.
- Add a second coat for full color richness.
- Allow to dry overnight before touching.
- Reinstall handles or knobs carefully.
- Consider a satin or eggshell finish for subtle shine.
- Add white or brass hardware for contrast.
- Optionally, add a stenciled floral motif for charm.
- Keep décor minimal to highlight the soft hue.
- Step back and admire how it breathes calmness into your room.
Benefits:
Pastel doors add a soft, romantic touch to your bedroom, promoting calm and positivity. They harmonize beautifully with neutral décor and feel gentle on the eyes—ideal for cozy, serene interiors.
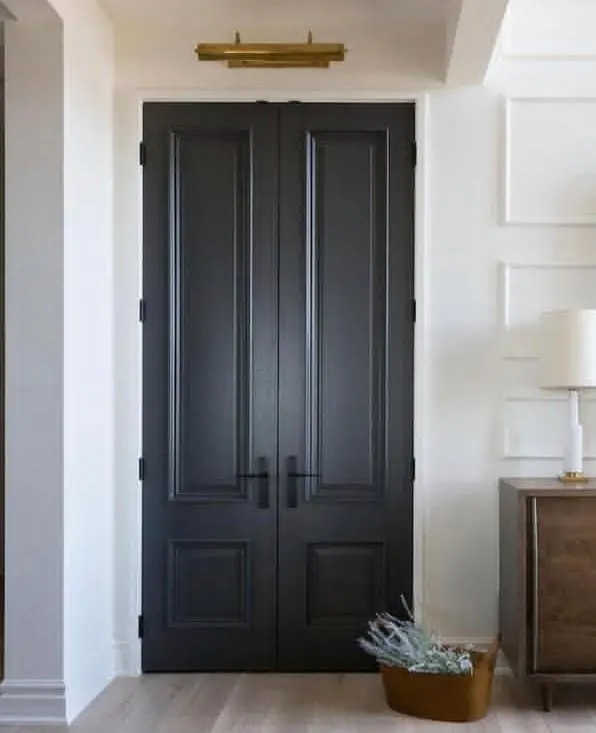
3. Moody Matte Black
Materials Needed: Matte black paint, primer, foam roller, brush, painter’s tape, and microfiber cloth.
Instructions:
- Clean the door surface thoroughly to remove oils.
- Apply primer for a strong, lasting base.
- Once dry, lightly sand for smoothness.
- Tape edges and handles to prevent mess.
- Apply the first coat of matte black paint evenly.
- Use long, consistent strokes to avoid streaks.
- Let dry completely before adding the second coat.
- Inspect under bright light for missed areas.
- Once fully dry, remove the painter’s tape.
- Add sleek brass or black hardware.
- Clean the edges with a damp cloth.
- Allow at least 24 hours for full curing.
- Pair with white or neutral walls for balance.
- Add artwork nearby to echo the modern tone.
- Enjoy the elegant drama that black brings.
Benefits:
A matte black door feels bold, timeless, and sophisticated. It creates instant contrast and defines space, lending your bedroom a designer-level edge without overpowering the room.
4. Warm Terracotta Glow
Materials Needed: Terracotta paint, roller, brush, painter’s tape, primer, and sealant.
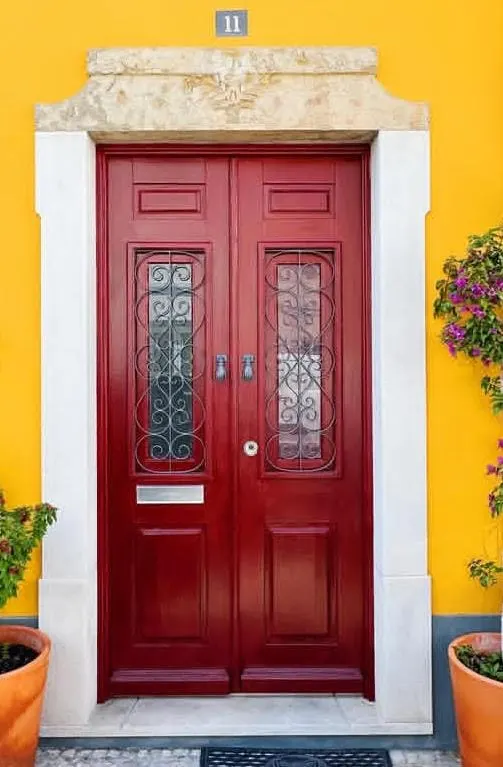
Instructions:
- Select a rich terracotta tone with warm undertones.
- Remove hardware and sand the door gently.
- Apply primer evenly and let it dry.
- Tape off the surrounding wall edges.
- Apply the first paint coat with a roller.
- Fill detailed corners with a fine brush.
- Wait 2 hours before adding a second coat.
- Use light, smooth strokes for texture control.
- Let the door dry overnight.
- Reattach hardware and clean edges.
- Consider matte or chalk finish for an earthy feel.
- Pair with woven or wooden accents.
- Add greenery around for natural harmony.
- Finish with a clear protective topcoat.
- Stand back and feel the cozy, rustic glow.
Benefits:
Terracotta brings warmth and comfort to your room. It evokes Mediterranean calm and rustic character—perfect for boho, earthy, or modern-natural bedrooms.
5. Sage Green Calm
Materials Needed: Sage paint, primer, roller, brush, painter’s tape, and matte sealer.
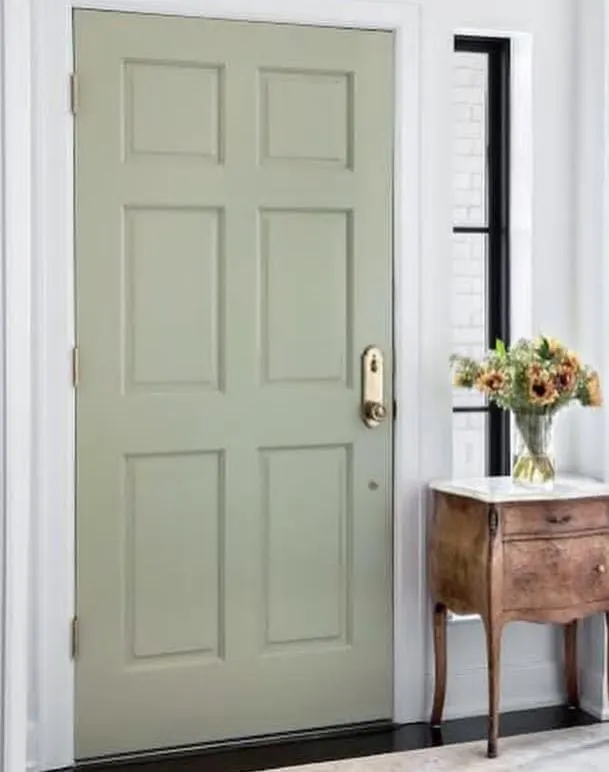
Instructions:
- Prepare your door by cleaning and sanding.
- Prime with a base suited for wood or metal.
- Choose a muted sage paint for calm sophistication.
- Apply painter’s tape for sharp edges.
- Roll on the first coat evenly.
- Let it dry before applying a second coat.
- Use a small brush to fill edges neatly.
- Sand lightly for a polished, velvety texture.
- Allow 24 hours to cure.
- Add natural brass or wooden handles.
- Complement with beige or cream walls.
- Keep décor soft and organic.
- Add plants nearby for continuity.
- Apply a matte sealer to protect from scratches.
- Step back and notice the soothing, natural aura.
Benefits:
Sage green evokes peace and balance, offering an organic, earthy tone that feels timeless. It complements wood tones, plants, and minimalistic bedrooms beautifully.
6. Distressed Cottage Whitewash
Materials Needed: White chalk paint, sandpaper, wax, brush, and lint-free cloth.
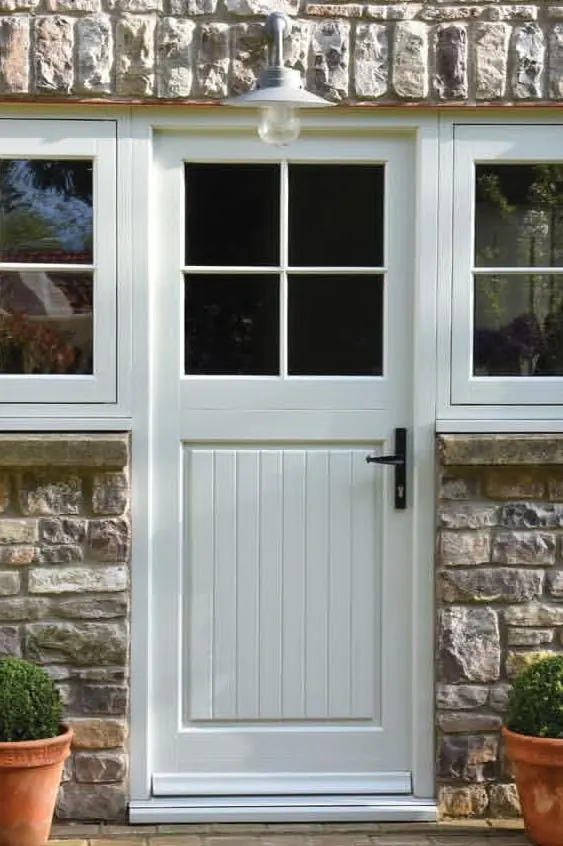
Instructions:
- Lightly sand the door to expose some wood grain.
- Clean thoroughly to remove residue.
- Apply the first coat of chalk paint roughly.
- Don’t aim for perfection—unevenness adds charm.
- Let dry, then add a second lighter coat.
- Once dry, sand corners and raised edges to distress.
- Rub with wax for subtle sheen and protection.
- Buff gently with a lint-free cloth.
- Add vintage-style knobs or pulls.
- Pair with rustic frames or floral textiles.
- Keep nearby walls in soft neutrals.
- Optionally stencil light patterns for interest.
- Use a dry brush for texture on final layer.
- Let cure overnight.
- Enjoy the charming, old-world warmth it brings.
Benefits:
This design gives your bedroom a nostalgic, romantic vibe. Perfect for cottage, farmhouse, or shabby-chic themes, it feels cozy, authentic, and lovingly aged.
7. Soft Ombre Door Shades
Materials Needed: Two or three coordinating paint colors, large and small brushes, sponge, painter’s tape, drop cloth, primer, sanding block, and clear sealant.
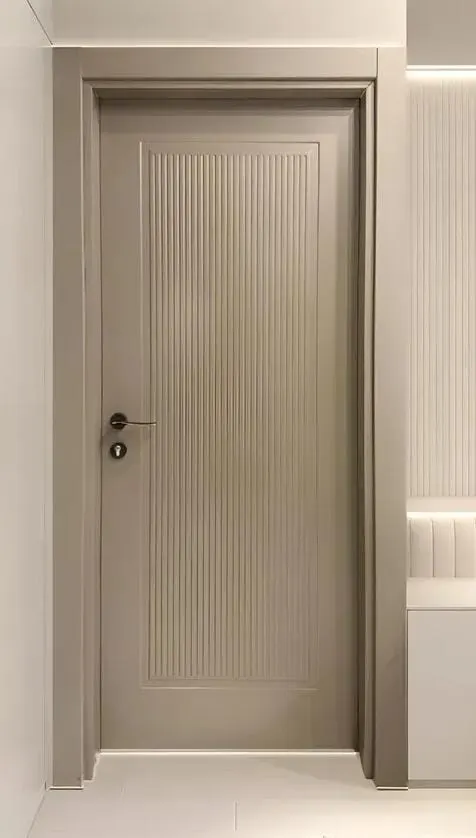
Instructions:
- Sand your bedroom door lightly to create a smooth, paint-ready surface.
- Apply a primer coat and let it dry completely.
- Choose a base color for the top section—something light and soothing like pale blush or mint.
- Mark three horizontal sections with painter’s tape for a clean gradient division.
- Apply the lightest shade at the top, mid-tone in the middle, and darkest hue at the bottom.
- Use a damp sponge to blend where the colors meet, creating a soft ombre flow.
- Blend with quick circular motions for a seamless transition.
- Step back occasionally to check for even gradients.
- Add a second coat once the first dries for richer depth.
- Let it dry fully before peeling off the tape.
- Use fine sandpaper to gently smooth any visible edges.
- Apply a clear satin or matte sealant to protect the finish.
- Allow at least 12 hours of drying before reinstalling the door.
- Style the surrounding wall in complementary neutral tones.
- Add soft lighting nearby to highlight the ombre effect.
Benefits:
This design gives your room a subtle romantic softness and visual height. The ombre tone adds dimension without cluttering the space. It works beautifully in minimal or boho-style bedrooms. The gradual transition of color enhances calmness and warmth. It’s ideal for those who want personality without bold statements. A perfect balance of elegance and creativity.
8. Deep Navy Statement Door
Materials Needed: High-quality navy paint, satin finish varnish, painter’s tape, roller, angled brush, sanding paper, and door handle in brass or matte black.
Instructions:
- Detach the door and remove hardware for a clean paint surface.
- Sand the surface lightly for adhesion.
- Apply primer, especially if your door is light-colored.
- Use a small roller to coat the main surface evenly with navy paint.
- Paint the edges with an angled brush for precision.
- Allow the first coat to dry completely.
- Apply a second, richer coat to deepen the tone.
- For a modern feel, keep brush strokes consistent vertically.
- Once dry, lightly sand to smooth the texture.
- Apply a satin varnish for durability and soft sheen.
- Reinstall with brass or matte black hardware.
- Consider adding trim paint in off-white for contrast.
- Decorate nearby walls with minimal artwork.
- Use warm lighting to enhance the navy tone.
- Let the door become the centerpiece of the space.
Benefits:
This door adds instant sophistication and a cozy masculine edge. Navy pairs beautifully with creams, golds, or blush. It brings calm energy while maintaining visual depth. The glossy finish adds light reflection for a luxe feel. Works perfectly for modern and transitional interiors. A timeless color that feels both bold and classic.
9. Rustic Chalk Paint Door
Materials Needed: Chalk paint (neutral or pastel), brush, soft wax, sandpaper, damp cloth, and hardware cleaner.
Instructions:
- Clean your door from dust or old finish.
- Skip priming—chalk paint adheres easily.
- Apply the first layer using broad brush strokes.
- Let dry completely for about an hour.
- Apply a second layer for full coverage.
- Once dry, use sandpaper to lightly distress edges.
- Focus on corners and panels for a vintage look.
- Wipe off dust with a damp cloth.
- Rub soft wax onto the surface with a lint-free cloth.
- Buff gently to achieve a subtle sheen.
- Replace hardware with aged bronze handles.
- Add a woven or macrame hanging nearby.
- Accent with earthy textures like linen curtains.
- Use a neutral wall backdrop.
- Stand back and admire the rustic transformation.
Benefits:
This idea brings a countryside charm with a lived-in warmth. Chalk paint adds texture and authenticity. Perfect for farmhouse or cottage bedrooms. It pairs effortlessly with wood floors and natural fabrics. The distressed finish gives character to plain spaces. A truly cozy and nostalgic upgrade.
10. Half-Painted Modern Minimalist Door
Materials Needed: Two contrasting paints, painter’s tape, level, primer, brush, roller, and topcoat.
Instructions:
- Prime your door with a base color—preferably white or light beige.
- Measure and tape a horizontal or diagonal line across the door.
- Paint one half in a bold color such as sage green or charcoal.
- Keep brush strokes clean and linear.
- Let it dry before peeling off the tape carefully.
- Apply a second coat for smooth coverage.
- Seal with a matte finish for a modern look.
- Match door trim with the lighter tone for balance.
- Use minimal décor nearby to maintain focus.
- Install sleek, simple hardware in matte black.
- Add a matching stripe on the wall for continuity.
- Incorporate clean geometric art.
- Keep lighting soft to highlight the color break.
- Add greenery to balance modernity.
- Let it dry and step back to admire the subtle statement.
Benefits:
This door creates visual structure and modern balance. The half-painted technique feels sophisticated yet playful. It’s ideal for Scandinavian or minimal bedroom themes. The sharp line adds precision and edge. Works best in spaces with clean lines and muted décor. Easy to customize with any two colors for contrast.
11. Botanical Hand-Painted Door
Materials Needed: Acrylic paints, fine brushes, primer, sealant, pencil, stencils (optional), and painter’s tape.
Instructions:
- Clean and prime your door thoroughly.
- Lightly sketch floral or leaf patterns with a pencil.
- Paint outlines using thin brushes.
- Fill in colors gradually, working from light to dark.
- Blend tones to give petals and leaves dimension.
- Allow layers to dry between applications.
- Add detailing using metallic gold or white highlights.
- For a cohesive look, paint smaller patterns near corners.
- Apply clear matte sealant once paint dries.
- Touch up small mistakes with matching base color.
- Style nearby with leafy plants or floral curtains.
- Use a warm-toned lamp to enhance the artwork.
- Keep hardware minimal to avoid visual clutter.
- Let it dry fully overnight.
- Enjoy your nature-inspired, artful masterpiece.
Benefits:
Perfect for adding a soft, feminine, and nature-inspired charm. It transforms a plain door into a canvas of creativity. The botanical theme adds freshness and tranquility. Brings a natural connection indoors. Ideal for romantic, boho, or garden-inspired bedrooms. A one-of-a-kind handmade statement.
12. Vintage Two-Tone Door
Materials Needed: Two complementary paint colors (e.g., cream and dusty blue), painter’s tape, primer, brush, roller, small detailing brush, and topcoat.
Instructions:
- Start by sanding your door to remove any old finish.
- Apply primer evenly across the surface and let it dry.
- Choose your lighter shade for the main panel area.
- Use a roller to apply the base coat and let it dry.
- Measure and tape off raised panels or trim sections.
- Paint these areas with your darker or accent shade.
- Peel off the tape slowly while the paint is semi-wet.
- Apply a second coat where necessary for coverage.
- Use a small brush to fix any overlap or imperfections.
- Lightly sand the edges to blend both tones seamlessly.
- Add a clear topcoat to seal and protect.
- Replace hardware with vintage-inspired knobs or brass pulls.
- Decorate around the door with classic framed art.
- Pair with muted curtains for a timeless finish.
- Let it cure overnight before reinstalling.
Benefits:
This door idea adds a charming, old-world appeal to your bedroom. The two-tone design provides visual structure and sophistication. It’s a subtle way to incorporate vintage charm without overdoing color. Works perfectly in traditional, cottage, or rustic bedrooms. The contrast elevates architectural details. It feels warm, nostalgic, and elegant.
13. Muted Terracotta Door
Materials Needed: Terracotta paint, matte sealant, roller, brush, primer, sandpaper, and brass hardware.
Instructions:
- Prepare the surface by sanding and cleaning the door.
- Apply a coat of primer suitable for warm-toned paint.
- Mix your terracotta shade to achieve the perfect earthy hue.
- Use a roller for large flat areas and a brush for edges.
- Let the first coat dry fully before applying the second.
- Gently sand between coats for a velvety smooth texture.
- Keep strokes in one direction for consistency.
- Once dry, apply a matte sealant to preserve the natural tone.
- Reinstall the door with brass or leather pull handles.
- Style with beige, cream, or stone-colored accessories nearby.
- Add terracotta pots or earthenware décor around.
- Incorporate linen curtains for a soft balance.
- Keep lighting warm and ambient.
- Step back and notice how earthy tones ground the space.
- Let it set overnight for complete curing.
Benefits:
This terracotta shade brings warmth and connection to nature. It softens the bedroom’s atmosphere and feels grounded yet sophisticated. Ideal for earthy, bohemian, or Mediterranean-inspired designs. The matte finish enhances organic texture. Pairs beautifully with wooden accents and woven fabrics. Creates a calm and nurturing mood.
14. Matte Black Elegance Door
Materials Needed: Matte black paint, primer, fine brush, roller, microfiber cloth, and clear topcoat.
Instructions:
- Clean and sand your door until smooth.
- Apply a primer suitable for dark tones.
- Roll on the first coat of matte black paint evenly.
- Use a brush for detailed corners and edges.
- Let it dry completely before the second coat.
- Lightly buff with a microfiber cloth between coats.
- Apply a final thin coat for even coverage.
- Avoid glossy sealants; choose a clear matte protector.
- Add brushed gold or silver hardware for contrast.
- Pair with monochrome art or black-framed mirrors nearby.
- Ensure the surrounding area stays minimal and bright.
- Use soft ambient lighting to prevent a heavy look.
- Clean the surface regularly with a dry cloth.
- Avoid fingerprints by using satin-finish paint if desired.
- Reinstall once fully cured for a sleek statement.
Benefits:
Matte black doors exude confidence and modern elegance. They instantly upgrade even simple rooms into luxe retreats. The texture absorbs light, adding depth and mood. Ideal for industrial, minimal, or modern bedroom designs. The contrast enhances other light décor elements. A powerful, timeless color choice.
15. Textured Linen Finish Door
Materials Needed: Linen paint roller, chalk-based paint, white glaze, dry brush, sanding pad, and sealant.
Instructions:
- Sand the door and wipe clean.
- Apply a chalk base coat using a linen roller.
- Let it dry for an hour before applying glaze.
- Brush on a light glaze and drag a dry brush horizontally.
- This technique mimics fabric texture.
- Allow to dry, then lightly sand for a worn linen look.
- Repeat glazing if you want deeper texture.
- Seal with a clear matte protective layer.
- Install brushed nickel handles for a soft finish.
- Keep nearby décor natural—cotton, jute, or wool.
- Paint the trim in soft white for contrast.
- Pair with neutral rugs or light curtains.
- Add subtle wall art in beige or gray.
- Avoid gloss to maintain texture visibility.
- Let the finish cure 24 hours before rehanging.
Benefits:
This door brings understated luxury with tactile appeal. The linen-like texture feels soft yet elevated. Perfect for cozy minimalist or coastal bedrooms. Adds visual interest without bright colors. Reflects light gently to create calmness. A design that whispers elegance, not shouts it.
16. French Country Blue Door
Materials Needed: Soft blue chalk paint, white dry-brush paint, wax, sanding block, and rustic handle.
Instructions:
- Sand the door to remove gloss and roughness.
- Apply a base coat of soft powder blue chalk paint.
- Let dry completely for one hour.
- Dip a dry brush into white paint, wipe off excess.
- Lightly brush over raised edges and panels.
- This creates a sun-worn, aged texture.
- Buff gently with sandpaper to soften transitions.
- Seal with a clear wax for protection and sheen.
- Add an antique bronze handle or knob.
- Complement with white or beige curtains.
- Place vintage floral art nearby.
- Keep lighting warm for a countryside glow.
- Accessorize with soft linens and lace.
- Enjoy the cottage-style tranquility.
- Let it cure overnight before reinstalling.
Benefits:
The blue hue evokes French countryside serenity. It adds romance and airiness to any bedroom. Chalk paint softens the visual tone beautifully. Works well in farmhouse or vintage settings. The dry-brush effect creates charming texture. A delicate mix of elegance and comfort.
17. Modern Color-Blocked Door
Materials Needed: Three contrasting paints, painter’s tape, primer, brush, and roller.
Instructions:
- Choose three colors that complement your room palette.
- Sand and prime the door surface for smooth adhesion.
- Mark sections with painter’s tape — horizontal or geometric blocks.
- Paint each block separately using precise strokes.
- Let the first section dry before moving to the next.
- Avoid overlapping to maintain clean divisions.
- Apply second coats as needed for coverage.
- Once dry, carefully remove the tape.
- Sand gently to smooth transitions.
- Apply clear sealant for longevity.
- Choose minimalist handles to balance bold color.
- Pair with abstract wall décor.
- Keep surroundings neutral to let the door stand out.
- Highlight with directional lighting.
- Let dry completely before reattaching.
Benefits:
Perfect for artistic and modern bedrooms. Adds vibrancy and visual intrigue instantly. The geometric layout feels youthful yet stylish. Balances playful design with structure. Works best against neutral or white walls. A fun way to show creativity and personality.
18. Weathered Whitewash Door
Materials Needed: White paint, water, cloth, sandpaper, wax, and brush.
Instructions:
- Mix white paint with equal parts water.
- Brush it lightly over the wood surface.
- Wipe immediately with a cloth to reveal wood grain.
- Let it dry before adding another thin layer.
- Focus on keeping texture visible.
- Lightly sand areas for a timeworn look.
- Seal with wax for subtle sheen.
- Keep hardware rustic—black iron or aged bronze.
- Frame the door with soft beige trim.
- Pair with distressed furniture for cohesion.
- Use linen bedding to echo natural tones.
- Add greenery or pampas grass nearby.
- Keep lighting natural and airy.
- The grain peek-through adds authenticity.
- Let dry overnight for a flawless finish.
Benefits:
This style feels coastal, calm, and timeless. The visible wood texture adds soul to your space. It brings a sense of quiet luxury and simplicity. Perfect for rustic, coastal, or Scandinavian bedrooms. Reflects natural light beautifully. Softens any harsh décor instantly.
19. Muted Clay Door
Materials Needed: Soft clay or sienna paint, primer, roller, detailing brush, matte sealant, sandpaper, and warm brass hardware.
Instructions:
- Begin by sanding the entire door to smooth out imperfections.
- Wipe the surface clean to remove dust and residue.
- Apply primer suitable for warm, earthy paints.
- Let the primer dry fully before adding any color.
- Mix your clay hue with a hint of cream for a balanced tone.
- Apply the first coat evenly using a roller.
- Paint edges and corners carefully with a brush.
- Allow the coat to dry completely before adding the next layer.
- Lightly sand between coats for a buttery finish.
- Seal the surface with a matte topcoat to preserve softness.
- Add brass or rattan handles for warmth and style.
- Pair with neutral curtains and textured linens.
- Place a woven rug near the door to complement the palette.
- Keep accessories minimal to let the door stand out.
- Let cure for 24 hours before use.
Benefits:
Muted clay tones create a sense of grounded calm. The earthy warmth adds balance to cool bedroom palettes. It’s cozy yet elegant, never overwhelming. Works beautifully in boho, mid-century, or rustic spaces. Enhances natural light with subtle glow. Feels serene and authentically organic.
20. Boho Patterned Door
Materials Needed: Stencils, painter’s tape, two paint colors, sponge brush, sealing wax, and cloth.
Instructions:
- Sand and clean your door surface completely.
- Apply a neutral base coat and allow it to dry.
- Position stencils symmetrically or freehand for a bohemian vibe.
- Use painter’s tape to secure stencils tightly.
- Dip your sponge brush into accent paint.
- Dab gently, avoiding heavy paint build-up.
- Lift stencils carefully to reveal crisp shapes.
- Continue patterning across the panels or center area.
- For layered depth, use a second color sparingly.
- Once finished, let the design dry fully.
- Lightly sand edges for a worn, artisanal look.
- Wipe the surface clean and apply clear sealing wax.
- Buff gently for a soft sheen.
- Pair with hanging macramé or earthy wall art.
- Step back and enjoy the handcrafted charm.
Benefits:
A boho patterned door adds personality and creativity to your bedroom. It breaks monotony with artistic flair. The handmade feel brings warmth and uniqueness. Perfect for eclectic, global-inspired interiors. Adds movement and texture visually. Turns an ordinary door into statement art.
21. Soft Blush Panel Door
Materials Needed: Blush pink paint, white accent paint, primer, roller, detailing brush, and clear satin finish.
Instructions:
- Prime your door with a neutral undercoat.
- Apply a first coat of blush pink across the surface.
- Let it dry completely before applying a second layer.
- Highlight panel grooves with white paint using a fine brush.
- Wipe off excess to create soft transitions.
- Blend colors slightly for a gentle fade.
- Use light brush strokes to maintain even tone.
- Add a third coat if richer color is desired.
- Sand gently to remove any streaks.
- Apply satin sealant for a subtle, reflective sheen.
- Replace hardware with crystal or pearl-like knobs.
- Add soft white curtains or floral wall décor nearby.
- Keep lighting warm and diffused.
- Avoid bold patterns around to maintain elegance.
- Let the finish cure for 24 hours before closing the door.
Benefits:
The soft blush tone adds instant romantic calm. Perfect for feminine or serene bedroom themes. Its understated hue pairs beautifully with whites and grays. Creates an inviting, dreamy glow. The satin sheen adds refinement without being flashy. A timeless, gentle color that soothes the senses.
22. Classic Cream Gloss Door
Materials Needed: High-gloss cream paint, primer, fine roller, brush, sandpaper, and microfiber cloth.
Instructions:
- Sand the door thoroughly to remove any dull areas.
- Wipe it clean using a damp microfiber cloth.
- Apply a primer to ensure smooth adhesion.
- Let the primer dry before adding paint.
- Roll on the first coat of high-gloss cream.
- Use long, smooth strokes to avoid brush lines.
- Let it dry completely before applying the second coat.
- Sand very lightly for extra smoothness.
- Apply the final coat for a polished effect.
- Clean hardware or replace it with gold or chrome.
- Keep surroundings neutral for a hotel-like appeal.
- Ensure plenty of lighting to emphasize shine.
- Add soft textures nearby—rugs, throws, cushions.
- Clean the surface regularly with a soft cloth.
- Enjoy the timeless elegance of your glossy door.
Benefits:
Cream gloss doors reflect sophistication and brightness. They open up small bedrooms visually. The finish feels fresh, luxe, and high-end. Works with both modern and traditional interiors. The glossy surface enhances cleanliness and polish. Perfect for creating an elegant yet welcoming space.
23. Olive Green Farmhouse Door
Materials Needed: Olive green paint, primer, brush, roller, matte sealer, and antique bronze handles.
Instructions:
- Sand and clean your door thoroughly.
- Apply a primer for darker tones.
- Paint the first coat of olive green evenly.
- Use a roller for broad areas and a brush for corners.
- Let it dry completely before applying the second coat.
- Lightly sand between coats for consistency.
- Use matte sealant to protect the finish.
- Add aged bronze or wrought-iron hardware.
- Frame with off-white or beige molding.
- Style the nearby space with rustic wall art.
- Pair with natural fiber rugs and wooden furniture.
- Incorporate linen bedding for earthy harmony.
- Keep lighting warm and inviting.
- Avoid over-decorating to maintain simplicity.
- Let paint cure overnight before regular use.
Benefits:
Olive green embodies cozy farmhouse serenity. It connects the indoors to nature’s palette. Balances rustic and refined aesthetics beautifully. The matte finish creates quiet sophistication. Works in both modern and country-style rooms. Feels earthy, restful, and grounded.
24. Metallic Trim Door
Materials Needed: Neutral paint (base), metallic gold or silver paint, painter’s tape, small brush, and clear sealant.
Instructions:
- Start by painting the entire door in a neutral tone.
- Let it dry completely before detailing.
- Tape off edges or trims where metallic accents will go.
- Use a fine brush to apply metallic paint carefully.
- Keep strokes smooth and even.
- Allow the metallic finish to dry fully.
- Remove the tape slowly to reveal crisp edges.
- Add a second coat for stronger shine.
- Use a clean cloth to buff gently.
- Seal with a clear satin topcoat for durability.
- Choose matching metallic hardware for harmony.
- Complement with art that has gold or silver detailing.
- Keep walls neutral to balance luxury.
- Add soft white or beige curtains to soften the look.
- Let the paint cure 12 hours before use.
Benefits:
Metallic trim adds instant luxury and refinement. It highlights the door’s architecture without overpowering. Reflects light subtly for a glamorous feel. Works beautifully with cream, gray, or navy walls. Adds a designer-inspired touch affordably. The effect feels elegant yet timeless.
25. Hand-Painted Artistic Door
Materials Needed: Acrylic paints, sealer, sketch pencil, brush set, painter’s tape, and matte varnish.
Instructions:
- Sand your door gently and wipe clean.
- Apply a base coat in a neutral or pale shade.
- Sketch your design lightly with a pencil.
- Use fine brushes for details and wide ones for fills.
- Paint botanical, abstract, or landscape themes.
- Allow sections to dry before adding next layers.
- Blend colors softly for depth.
- Outline details in contrasting tones for definition.
- Let the artwork dry completely overnight.
- Seal with matte varnish to protect your design.
- Avoid glossy finishes to retain artistic character.
- Frame with simple trim so the art stands out.
- Keep nearby décor subtle and light.
- Add spot lighting to highlight your creation.
- Step back and admire your unique, custom masterpiece.
Benefits :
This design turns your door into a personal statement piece. Hand-painted art brings creativity and individuality. It’s an affordable way to express style through design. Adds emotion, depth, and story to your bedroom. Guests immediately notice its originality. A truly one-of-a-kind aesthetic.
Conclusion: Transform Ordinary Doors into Artful Statements
Your bedroom door doesn’t have to blend in—it can set the mood, tell a story, and anchor your entire décor style. Whether you choose a moody matte black, a sun-kissed whitewash, or a delicate blush, every idea above helps create personality and warmth. A painted door is more than décor; it’s an expression of self, creativity, and comfort.
When you take time to paint, layer, or detail your door, you’re not just changing color—you’re elevating the experience of entering your own private haven. Save these 25+ Door Painting Ideas for Your Bedroom on Pinterest to revisit later, and let each brushstroke remind you that even the smallest updates can bring the biggest transformations. For more creative inspiration that blends home beauty with personal fashion style, visit Vidafit — where design meets elegance every day.


